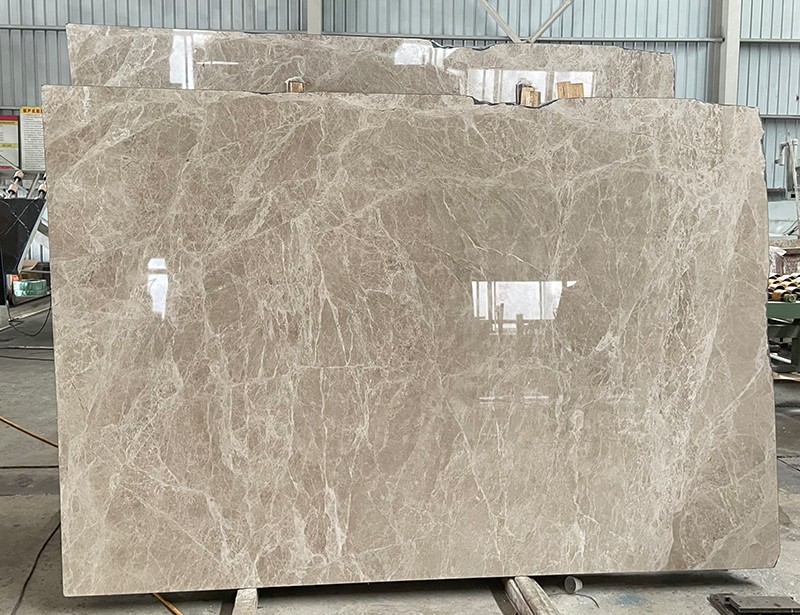
Grey Emperador marble is a recognized marble of great beauty and resistance, due to this it can be used for both interior and exterior areas. It does require regular maintenance and polishing if you want to keep this stone looking flawless alongside making sure it lasts at least a lifetime this way. The following help guide explains in detail how to polish Grey Emperador marble for optimal shine and preservation of its luxury appeal for long years to come.

What is Grey Emperador Marble?
Grey Emperador is a marble, characterized by its elegant grey color with white striking across a dark grey background. This marble comes from the mountains or quarries and have a variety of colors and unique beauty, durability. The material is very porous so it is prone to staining and etching from acidic substances and therefore needs to be properly cared for.
Initial Assessment and Preparation
Before commencing the polishing process, it is imperative to assess the condition of the marble. Look for any signs of damage, such as scratches, stains, or etches. These issues must be addressed before polishing to ensure an even and flawless finish.
- Cleaning the Surface: Begin by thoroughly cleaning the marble surface. Use a pH-neutral cleaner specifically designed for marble to avoid damaging the stone. Mix the cleaner with water according to the manufacturer’s instructions and apply it to the surface using a soft cloth or sponge. Rinse with clean water and dry with a soft, lint-free cloth.
- Removing Stains: If there are any stains, they should be removed using a poultice. A poultice is a paste made from a solvent and an absorbent material, such as kaolin or talc. Apply the poultice to the stained area, cover it with plastic wrap, and leave it for 24-48 hours. After this period, remove the plastic wrap and allow the poultice to dry completely before scraping it off gently.
Polishing Process
Once the marble is clean and free from stains, scratches, and etches, the polishing process can begin. This involves several steps to restore the marble’s shine and smoothness.
Step 1: Sanding
Sanding the marble surface helps to remove any remaining imperfections and creates a smooth base for polishing. Use diamond sanding discs starting with a lower grit (e.g., 400) and gradually move to higher grits (e.g., 800, 1500). This gradual increase ensures a smooth and even finish without damaging the marble.
- Lower Grit (400): This initial sanding step removes deep scratches and surface imperfections.
- Medium Grit (800): This intermediate step further smoothens the surface, preparing it for finer polishing.
- Higher Grit (1500 and above): These grits refine the marble surface, bringing out a subtle shine even before the final polishing.
Step 2: Polishing
Polishing compounds designed specifically for marble are essential for achieving a high-gloss finish. These compounds contain fine abrasives that help in smoothing and shining the surface.
- Applying the Polishing Compound: Use a polishing machine with a felt pad attachment. Apply a small amount of polishing compound to the marble surface. Work in small sections to ensure even application and avoid the compound drying out.
- Polishing: Move the polishing machine in a circular motion, applying consistent pressure. Continue polishing until the marble develops a high-gloss finish. This process may need to be repeated several times to achieve the desired level of shine.
Step 3: Buffing
After polishing, buffing the marble surface helps to enhance the shine and remove any remaining polishing compound. Use a clean, dry microfiber cloth or a buffing pad attached to a polishing machine. Buff the surface in a circular motion until it gleams.
Sealing the Marble
To protect the polished surface and maintain its luster, sealing the marble is highly recommended. Marble sealers create a protective barrier that prevents stains and reduces the risk of etching.
- Choosing a Sealer: Select a high-quality penetrating sealer designed for marble. Penetrating sealers absorb into the stone, providing long-lasting protection without altering the marble’s natural appearance.
- Application: Apply the sealer evenly across the marble surface using a clean, dry cloth or a brush. Allow the sealer to penetrate the marble for the recommended time, usually 15-30 minutes. Wipe off any excess sealer with a clean cloth to avoid streaks or haziness.
- Drying Time: Let the sealer cure for the time specified by the manufacturer, typically 24 hours. During this period, avoid using the surface or placing objects on it.
Maintenance Tips
To keep Grey Emperador marble looking its best, regular maintenance is essential. Here are some tips to ensure its longevity and beauty:
- Nettoyage régulier: Clean the marble regularly with a pH-neutral cleaner and avoid using abrasive or acidic cleaners that can damage the surface.
- Immediate Spill Removal: Wipe up spills immediately to prevent staining, especially from acidic substances like lemon juice, vinegar, or wine.
- Using Coasters and Mats: Place coasters under glasses and mats under hot dishes to protect the marble from potential damage.
- Periodic Re-Sealing: Re-seal the marble surface every 6-12 months, depending on the level of use and exposure, to maintain its protective barrier.
By following these steps and maintaining a rigorous and realistic approach to care, your Grey Emperador marble will continue to exude elegance and sophistication, enhancing the beauty of any space it adorns.


